
Hello ladies and a big WELCOME to the Scrapbook Divas 12 Days of Christmas Extravaganza!!!
Michelle and all the Diva Designers, including our special guests, hope to spoil and inspire you over the next 12 days with lots of festive creations and ideas.
We hope you will join us here on the blog everyday for a new project, and chat with us HERE in the forum too.
So without further ado ...
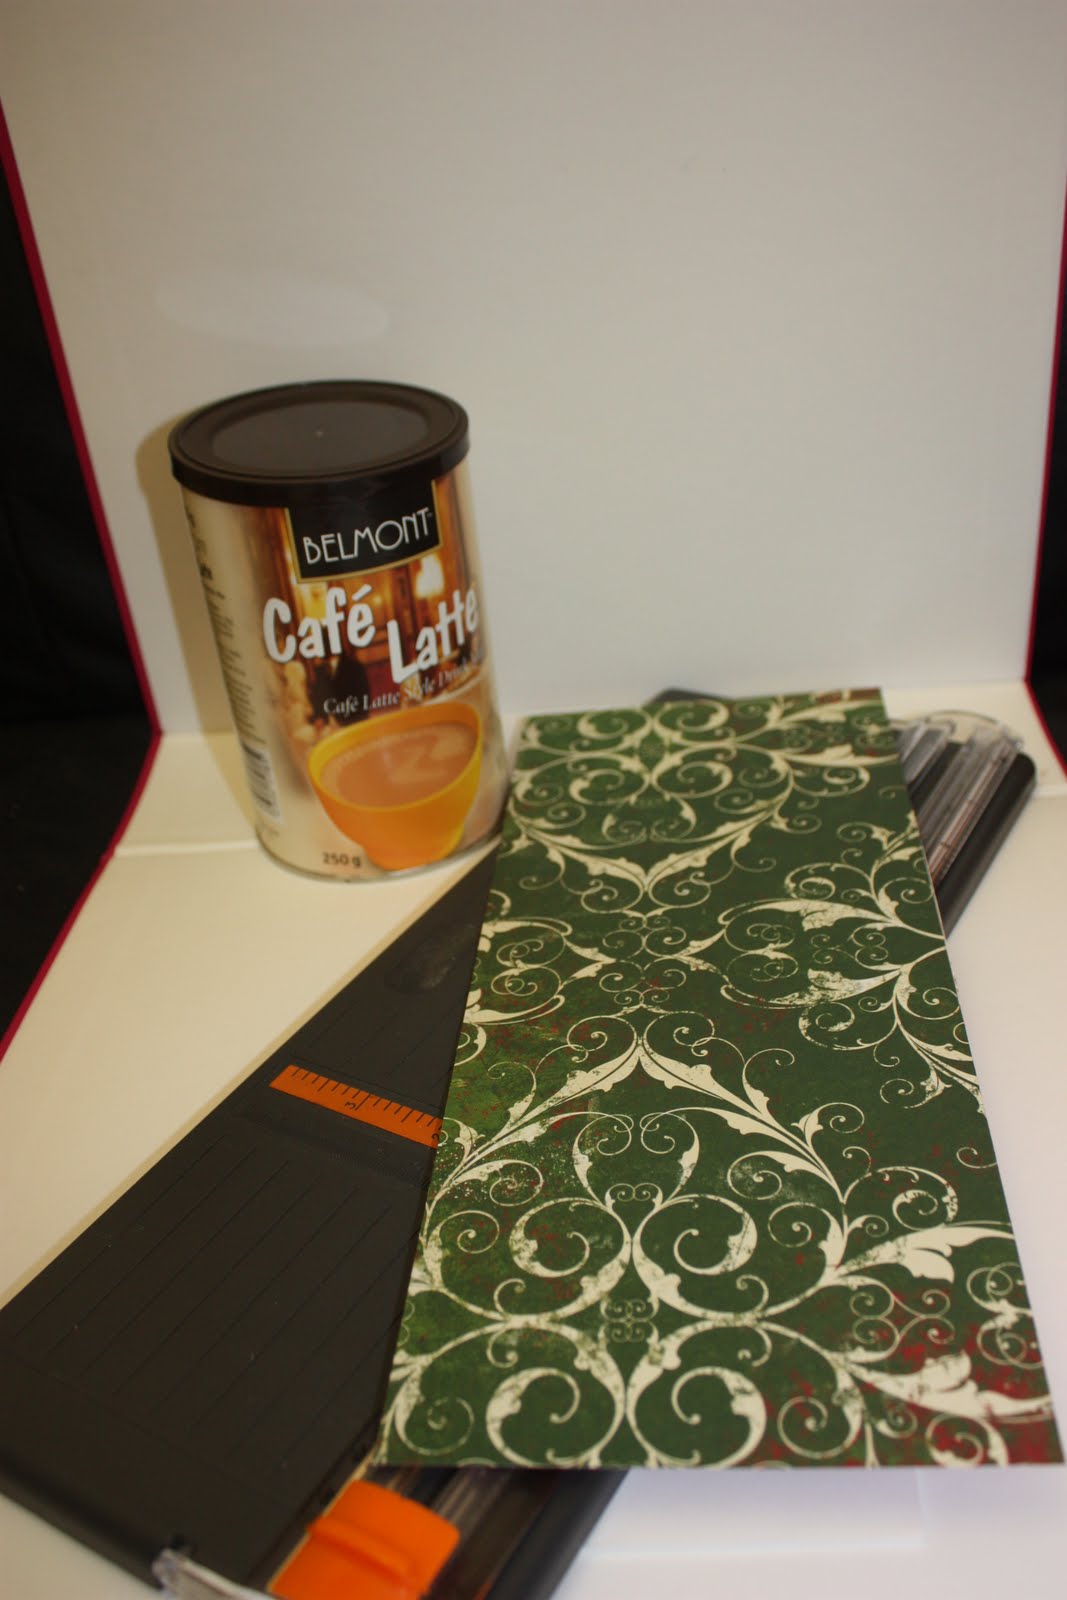
On the first day of Christmas my true love gave to me ... recycled containers to put under the tree!
Ok, so perhaps my singing and rhyming isn't so great but I hope you like these ideas for Christmas Gift Giving. They are very cheap and cheerful and something a little different from the usual paper-wrapped box or parcel.
Step 1
* Gather your supplies ... various containers like coffee cannisters, mint tins etc.
* Christmas scrapping papers, adhesives, ribbon, embellishments

Step 2
* Start by measuring the height of your chosen container and cut a strip of your patterned paper to fit
* Wrap it around your container and overlap the paper a little, then mark the join and cut off any excess length
 Step 3
* Adhere your paper around your tin using either double sided tape, or a liquid/gel glue. I used PVA with a brush so there were no wet/lumpy spots
* Using a tissue or small piece of cloth, rub all over the paper so it is well stuck on your tin
Step 4
* Embellish your tin - be as simple or fancy as you like, depending on your available supplies
* Here I have simply put a strip of contrasting patterned paper, punched with my Fiskars border punch, and tied some Christmas ribbon around the middle - it is held in place with a couple of little pieces of d/s tape under it. Then I punched a scalloped circle as my tag and stuck on a gold Christmas sticker
* For the lid I cut a circle of matching patterned paper a fraction smaller than the diameter of the lid then used some cord stuck around the edge
* For the centre decoration you will need 4 punched scalloped circles. Lay the circle flat on the table in front of you and, counting around 5 scallops, fold it down. Turn it over so the folded edge is at the top of you. Using your thumb nail as a guide, find the middle of the folded edge and fold down each side to the middle point. You now should have a "v" shape at one end and the scalloped rounded edge at the other. Repeat with the other 3 circles. To make the "flower" put the pointed ends in towards the centre and adhere - it may help to stick them on another small circle as its base. Decorate the centre of your "flower".

You're all done!!! Fill the tin with your gift - it could be something as simple as chocolates or homemade shortbread wrapped in celophane. What about rolling up socks/jocks/boxer shorts for Dad ... or pens/pencils for the kids ...
You are only limited by your imagination and the sizes of your containers.

This would make a great little gift for teachers and the like. It's inexpensive, you're doing your bit for the environment (recycling) and it looks wonderful. It's also a great way to use up your older Christmas scrapping goodies.
PS. Although it doesn't show in the photos, I have run clear Kindyglitz over all the swirls on the patterned paper, just to add some extra sparkle.
***************
Here's another idea ... a little tin of vouchers. I have made this for my children and I to give to their father, but you could adapt it to suit anyone, young or old.
Step 1
* Gather your supplies - these mint tins are just so cute and a great size
* Christmas scrapping papers, ribbon, rubons, embellishments
Step 2
* As with the first project, cut your paper to size and adhere. You will also need to cut a piece for the top of the tin
* To get your edges nice and clean, once the glue is dry, use your file along the edges which will "tear" away any little bits overhanging leaving a neat edge
* Embellish your tin - I have used rubons, kindyglits and ribbon
Step 3
* Making your vouchers - Cut your paper to fit inside the tin (you could round the corners if you like)
* Type and print your vouchers -eg. free hugs, free kisses, free massage, free beer, a night off the BBQ ... be as creative or simple as you like
* Put your vouchers together, embellish if you like, and hold with a brad in one corner
 And here is your cute little novelty gift for a loved one. Hope you like it.
11 comments:
They are fantastic Helen
I love them! I'm all for recycling too.
What a fantastic idea Helen. They are great!!! Will definitely be giving these a go.
great idea to incorporate recycling..will be giving this a go with my girls :)
Fabbo ideas there Helen, I love the little tin of vouchers - that's just gorgeous!!!
fantastic Helen, your instructions are great :)
Fantabulous! HElen will give these a go!
These look great Helen!
I love them Helen & what a great idea with the gift voucher tin, very cute. I have shown this to my granddaughter today and she is going to make them for her mum & dad.
Marion
Gorgeous... I think I'll make a tin of vouchers for the kids to give ME!!!! Coupons for back rubs, cups of tea, nanna naps.... mmmm I LIKE IT, I lIKE IT ALOT!!!! ;) Thanks for the share Helen they look fantastic.
WOW... I LOVE them!! great way to recycle and make all things pretty!!
Post a Comment