
'On the 6th day of Christmas my true love gave to me six geese a laying', well at the Embellees 'table' they will be laying on our plates with these beautiful but, very quick and simple table settings.
As you have guessed by now I love to use up my 'stash', use my tools, mix in a few vintage/repurposed elements and go for simple and quick projects I can actually make happen in my busy life. This year my niece is hosting Christmas lunch and she asked me to 'set the table'. Her only request was to use hotpink as the core colour. So here is sample of what our Christmas table is going to look like...kinda mini version, as I anticipate adding a few other bits of gorgeousness.....

To get started you need to grab:
- Chrissy papers (4 sheets of double sided to match your decorations/table scape)
- Punches (borders and shapes)
- Die cuts for your Cuttlebug/Bigshot
- Crochet doily
- Cotton String
- Dymo labeller
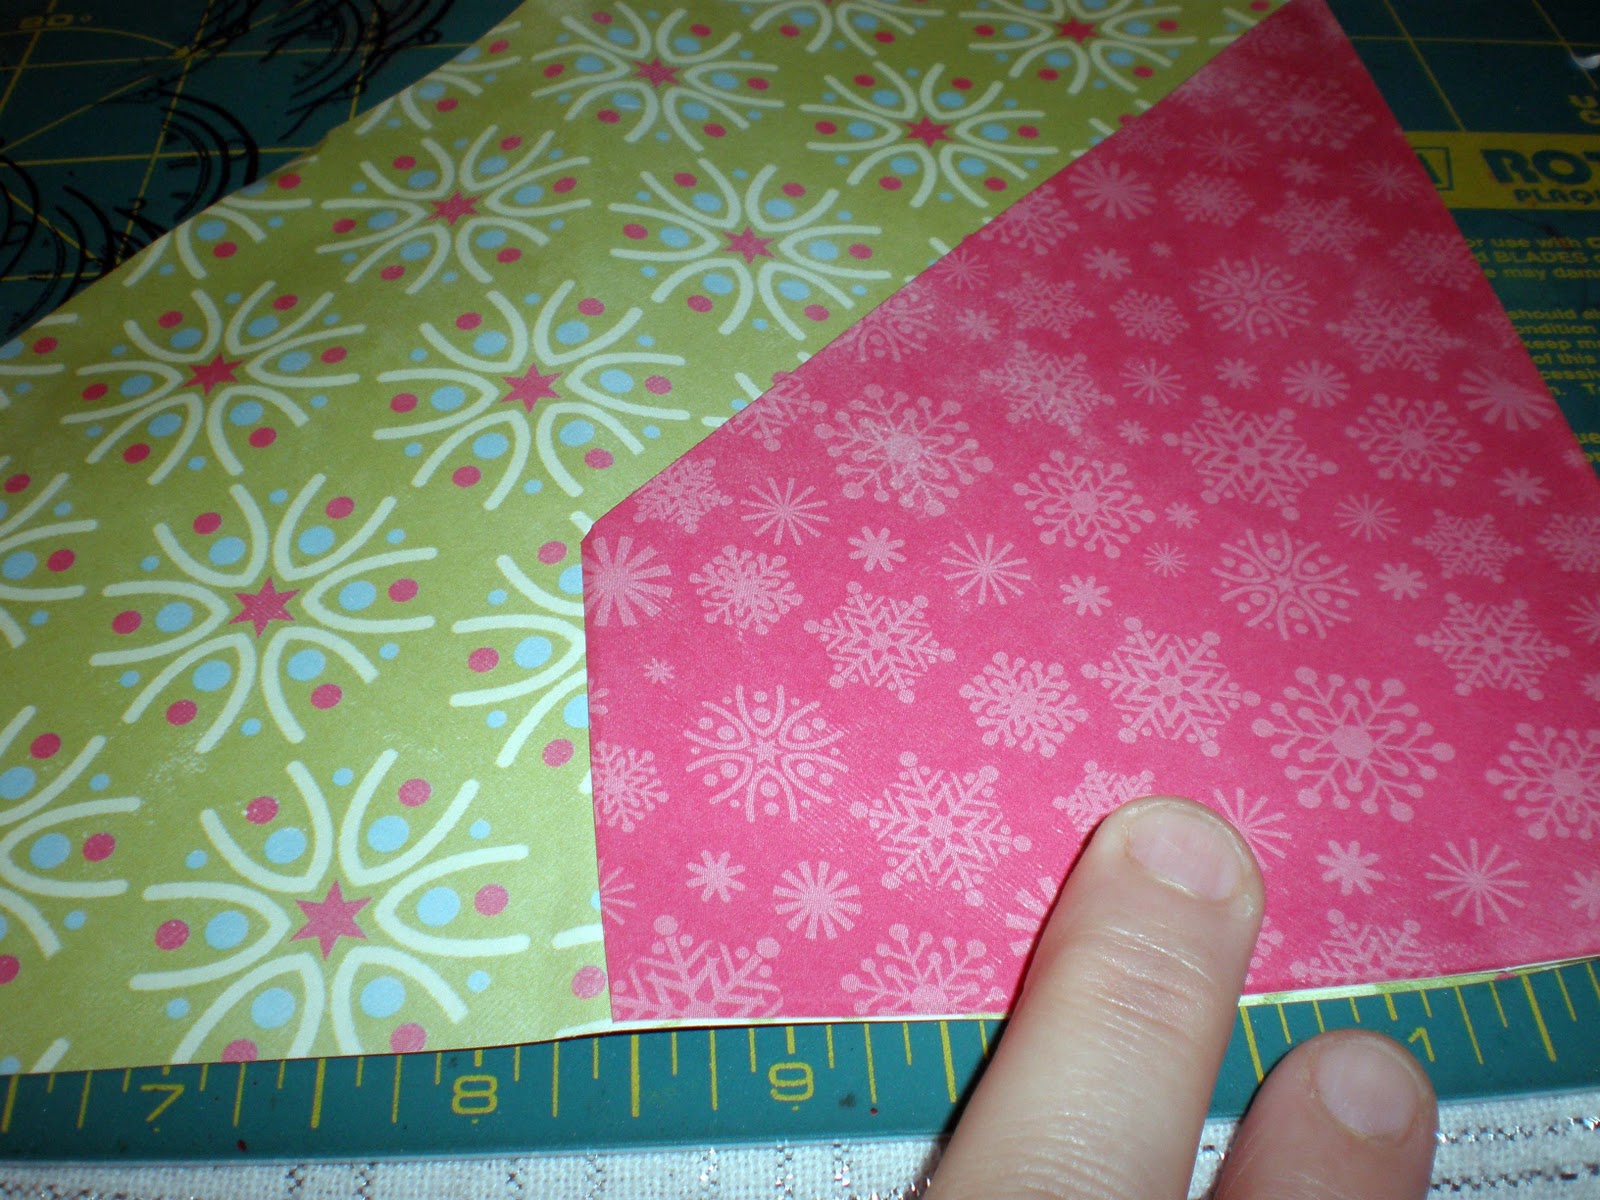
Step 1: Making the Napkin Envelope


One 12 x 12 double sided paper cut in half on the diagonal
Folding into envelope shape (check out the photos and follow the steps)


Decorate to compliment your table scape or your chrissy theme (I wanted a vintage/shabby chic feel for our look this year).
- I have used the Tim Holtz birdcage diecut to cut out blue glittered cardstock, book paper for the bird, spiral border punch (Martha Stewart), cotton string (oooh Michelle would be pleased I grabbed this from OfficeWorks), part of my vintage doily (refer to hint below) and not to be forgotten some kaiser bling!

Handy Hint: Using old crochet doilies is all the rage at the moment. I have purchased them from all over... Vinnies, markets, antique shops, but I always look for ones that have a good solid flower shape I can cut out. I also love to use the other bits on projects - so in this one I have used little bits of the crochet on each project to tie them all together - just check out the state of the doily I used... it was a 20 cent one with a hole in it from Vinnies - but I just loved the green as it was unusual... all my 6 place settings will have different doily pieces - they don't need to be 'matchie matchie' gives more of that eclectic/shabby chic feel I want to achieve ....

- Chose a diecut that will suit, in my case I have used the gorgeous Top Note from Stampin Up - such a versatile die cut. Remembering I wanted to keep this simple.. you could just cut a square 4.5" x 3.5".
- Fold in half (I used a bone scorer to give me a crisp folded edge).

Again, you can decorate to match your table scape/decorations.
- I used my scallop punch and with a little mist of water damped down my shape to help with the 'scrunching' process. I displayed this with the co-ordinating side of my double sided paper showing.
- I added a small piece from my 'tattered' doily edge as a frill.
- I couldn't resist another book page bird (cut from my Tim Holtz Sissix Die Cut on my cuttlebug/BigShot).
- To continue the vintage feel, I love using my dymo tape labeller and yes my name at home is Elizabeth (for those who know me as Lizzie).
Step 3: Wrapping the Cutlery

- I just love this idea and what better way to introduce the very popular paper doily or benders as the catering bods call them. I was just lucky enough to have hot pink ones in my stash (gotta luv those Hot Dollar Shops I frequent).
- Wrap your doily around your cutlery and fix in place.
- Cut a length off your 12" x 12" paper - approximately 1" wide and wrap it around the doily - finish this by leaving a tail to the left and cutting on the diagonal.
- Again, use the same technique above with your scallop punched circle misted and scrunched or if you have a Cuttlebug/BigShot emboss the scallop circle to add texture.
- To finish off your embellishment use similar bits to tie in with your name plate and napkin envelope - in my case I added some of the crochet doily, cotton string and dymo labelling!

Although this setting is simple and not loads of technique - that was the idea. When you have to repeat a project to make multiples - you need to keep it simple. In my case I have to replicate 3 items x 6 people - so the KISS principal had to apply .... I also love that this used up my stash, had me using my Cuttlebug/Bigshot and punches (love to get the most out of the expensive tools I have) and, lastly included some vintage finds.
I hope your family will be just as happy when they sit down to Christmas lunch and see the effort you have gone to add that 'handmade' touch to your table - it will definitely give them a better understanding of what you have all that stuff for....
Wishing you all a very merry and safe Christmas!
from Lizzie @ Embellees

4 comments:
Thanks Liz for another great project
What a great range of beautiful ideas, love them. Got the brain really ticking now ;)
These are gorgeous Liz! I know your table is going to look gorgeous with these on Christmas Day!
I'm coming to your house - I want some of the loveliness!!!!!
Post a Comment